|
Follow these instructions to install the RMI Plug-in for Eclipse. You can also watch the installation flash
movie.
- Save all your work and exit Eclipse
- Download the latest version of the RMI Plugin for Eclipse ZIP file from http://www.genady.net/rmi/v20/downloads.html
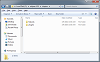
- Extract the contents of the ZIP file into the
"
dropins" directory of your Eclipse installation.
The "dropins" directory may be empty or contain
"features" and
"plugins" directories.
|
 (click to enlarge) (click to enlarge) |
- Start Eclipse.
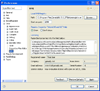
- Open the About dialog
("Help->About Eclipse") and check whether you see the RMI Plug-in icon
If you did - and it's not an upgrade, then the installation is complete. Otherwise keep reading.
- If this is an upgrade, but the displayed plug-in version is still the old one, use "Help->Check for Updates" command to instruct Eclipse to pick up the extracted files. Restart the worbench when prompted (do not use the "Apply Changes" option).
- If you still cannot find the RMI preferences section, try closing
Eclipse and starting it again, this time passing the "-clean"
command line argument to the eclipse executable. If the "-clean" flag has helped, you can continue starting Eclipse normally without the "-clean" flag.
See "Eclipse Release notes" for more
information.
- If you still can't see any of the RMI Plug-in actions, try deleting the installed files of the RMI Plug-in and use the update site method.
|
(1. click to enlarge)
|
|
) (click to enlarge)
(click to enlarge))